The 9-Step Process to Sell Courses on LearnDash (Without Creating Them Yourself!)
Starting an eLearning website is easy enough when you know what you are going to teach. But what if you don’t know what you want to start with?
This particular problem has killed more e-Learning sites than anything else (and that too even before they were created).
But that doesn’t need to be the case – you can easily sell the courses created by others on your LearnDash site while sharing a part of your earnings with them.
Picture this – you set up an eLearning platform where you sell courses created by other teachers and instructors who are great at teaching but don’t have a way to properly sell and market them.
All you need to do is maintain the platform and focus on marketing, while they get to do what they love best – teaching! Win-win, right?
In this article we’ll be discussing the exact step-by-step process of doing the same.
So, without taking any more time, let’s dive straight into it!
Table of content
Step 1 – Setup WordPress and an LMS plugin
The first step towards creating your e-Learning site is to install and set up WordPress.
Since you’re creating a website that will sell courses and learning material, you’ll also have to install an LMS plugin along with WordPress.
We recommend LearnDash
Fortunately, both these tasks are dead simple. Follow the WordPress setup guidelines to install WordPress properly and setting up the LearnDash LMS.
Step 2 – Get a good LearnDash theme
Once you’ve installed and set up both LearnDash as well as WordPress, the next step is to get a good LearnDash theme for your site. Unlike a typical WordPress theme, LearnDash-specific themes are designed to have eLearning-centric features and student management options that help you manage your eLearning platform better.
There are dozens of LearnDash themes to choose from, like

LearnMate each with its own differentiating factor. LearnMate makes course creation and management extremely easy with its extra widgets and course layouts. Further, it has a drag-and-drop course builder that helps you build your eLearning website super-quick.
Another good option is eLumine –

a LearnDash-based theme that comes with a lot of student-focused features like Focus Mode, swift loading grid layouts and a buyer page that is highly optimized for conversions. It has also got multilingual support with support for RTL languages, which means that you can share your course material in any language of your choice.
Some of the other popular LearnDash themes include Astra, the BuddyBoss theme for LearnDash, etc.
Step 3 – Set up an eCommerce plugin
Since you also want to sell courses on your website and not just create them, you will need an eCommerce platform to manage your transactions. So, once your WordPress installation with LearnDash LMS and a compatible theme is up and running, the next step is to install and set up an eCommerce plugin so you can start selling your courses.
We recommend WooCommerce.
WooCommerce is one of the most popular and powerful eCommerce plugins for WordPress. It has a ton of features, is extremely easy to use, and has a number of nifty extensions that can help you sell your courses better.
You can install it like any other plugin from the WordPress plugin directory. Once you’ve installed and activated it, you can set it up using the detailed instructions given in the WooCommerce documentation.
Step 4 – Integrate a payment gateway
At this point, slowly, but surely, you can see your course website taking shape.
You have LearnDash to manage your course pages and WooCommerce makes the arrangement for selling those courses.
However, there’s still one other external element that you need to set up before you can start selling. What is it? It’s a payment gateway.
For your course-selling website, we recommend Stripe for WooCommerce.

The Stripe add-on is unarguably the best payment gateway for any WooCommerce site as it accepts payments from all across the world and can be integrated very easily.In addition, it allows your learners to pay for their courses without taking them away from your site, which ensures that the user experience carefully crafted by you remains in place.
Keep in mind that the payments you receive from your customers are routed to your bank account through payment gateways, so they too need to be integrated in a careful manner. If you don’t want to integrate Stripe due to some reason, given below is some further advice on the subject.
There are different types of payment gateways, and all of them are integrated in different ways. You can check out 4 different methods of payment gateway integration in this article. LearnDash provide integration addons for WooCommerce, Paid Memberships Pro, Restrict Content Pro, Stripe and SamCart for selling online courses.
Moving on to the next step – adding your teachers on the website.
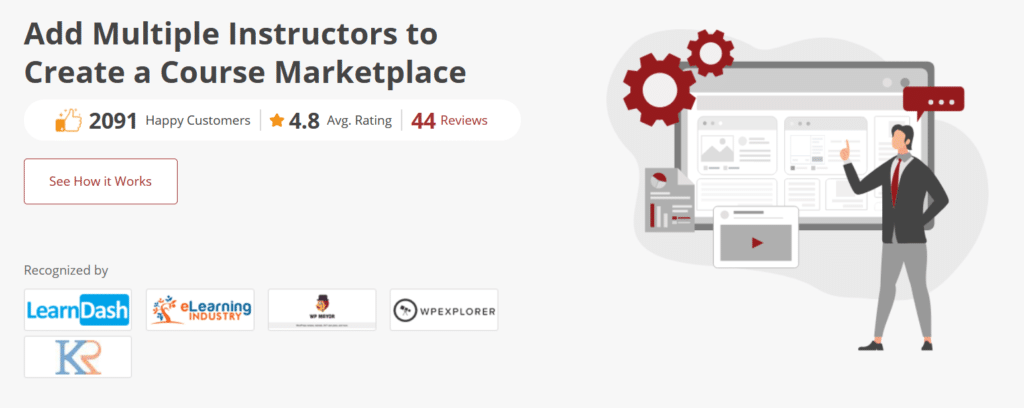
Step 5 – Set up Instructors and assign their commissions
Since you’re not creating the courses yourself, you need to set up multiple teachers and instructors on your site, so each of them can create their own courses and manage their own students. You also need to set up commissions which instructors on your site receive from every sale.
Ordinarily, LearnDash allows only website Administrators to create courses on the platform, but giving Admin privileges to your Instructors can be unwise, as it opens up your site to a lot of potential security issues.
A better option is to keep your core website closed to instructors and just give them the permissions they need to set up and manage their courses.
This can be easily configured by adding and setting up the Instructor Role add-on for LearnDash. What this plugin does is, it adds a new ‘Instructor’ role to your WordPress setup, which can be assigned to the user account of anyone who wants to sell their courses on your site.
The authority of this role remains limited – none of the instructors can intervene with the functionality of your site, nor can they access the data of other instructors. All they can do is create their courses, post them to your site, and manage their students – that’s it!
For managing transactions, the plugin also allows you to set up commissions for each course, or each instructor, wherein you can define what percentage of the course fee they will get.
For instance, say a course is priced at $100, and you have set the commission percentage to 60%, the Instructor will earn $60 and you will earn $40 every time the course is sold.
You can manage these settings by navigating to the Instructor page of your LearnDash LMS. The page looks something like this:

As you can see, you can define the commission of every instructor on this page. The interface is quite simple and self-explanatory, but should you run into any difficulties, you can find the solution in the plugin documentation.
LearnDash Dashboard
The LearnDash Reporting addon to provide different dashboard to instructors, group leaders and Students. Dashboard for instructor will show count of courses, lessons, topics etc. Course details, messages, email option, student details and activity feed, LearnDash notes. Same way different widgets to shown on group leaders and students. Checkout the LearnDash Dashboard Demo.

Step 6 – Set up your Home and Shop Page
By now you’ve completed half of your journey – your site is ready for the instructors to create and post their courses, to sell those courses, and to receive the payments.
Now all you need is a nice Homepage and Shop page that gives a professional vibe to your LearnDash website.
WooCommerce has default Shop page layouts that you can use, but we recommend using or creating ones that are more eLearning-centric.
Most WooCommerce-compatible themes have additional layouts that you can choose from.
Step 7 – Optimize for SEO
Once your site is up and running, the next step is to work for its marketing. And when we think of marketing in the modern times, how can we not think about SEO?
You should optimize the course pages on your site for Search Engines (mainly Google), and this you can achieve by optimizing the course names, URLs of course pages and the descriptions of those pages.
All these elements should include the keywords your learners search on Google when they’re looking to learn about a particular subject. Here are some of the on-page SEO tasks that you should do:
- Keyword research: Find out the popular long-tail keywords your learners use to search for the information on subjects that you’re covering in your course. There are a number of online tools available to help you with that.
- Include keywords in the content: The next step is to include the keywords that you found in your course pages. Every keyword should be present in the course title, course description and Alt attributes of some of the images on the course page. You can also take advantage of semantic keyword research and include some related keywords in the course pages, which is a proven method of boosting your authority in the eyes of Google’s algorithms.
- Optimize for bounce rate: On-page SEO is no longer about keywords alone. You also need to optimize your pages for. To do that you need to organize your course content in a clutter-free and easily understandable manner. Use neat grid layouts for your pages that list all your courses and a clean boxed layout for the pages of individual courses. Remove distracting elements (i.e. popups, ads) from your pages, avoid long paragraphs, and use bullet points wherever possible to make your content more readable.
There are some other tasks too that should be done in on-page SEO, and it’ll be best if you hire a professional search engine optimizer to take care of your whole SEO related needs. But if you can’t hire an SEO in the beginning and want to do the basics yourself, then the 3 tasks given above are the bare minimum you need to do from an on-page SEO perspective.
Why is this important?
Good website SEO can help your courses and site rank, which will result in increased traffic and hence, sign-ups, for your courses. There are eLearning giants like Coursera, edX, and Udemy out there and if your website has to rank for content above these, you need to have awesome courses and even better SEO!
Step 8 – Set up website security and backup
Security is an essential element of all modern websites, and it’s even more important for e-Learning sites because they house your intellectual property, confidential data related to your students, payment details like Credit card information, and other sensitive data.
If the website is compromised, the entire flow of learners can be disrupted.
So it’s of utmost importance that you take the necessary steps to ensure the security of your LearnDash site.

Here are some standard best practices:
- Use strong passwords: Strong passwords are the first basic requirement of cybersecurity. If your passwords are not strong, they can be easily cracked either by guesswork or by trial-and-error based attacks (i.e. brute force attacks). So you should use strong passwords not only yourself but also force others who access your site (i.e. the instructors as well as students) to use strong passwords for their accounts.
- Install security-related plugins: There are many WordPress security plugins in the market that can take good care of your overall security requirements (i.e. All in One WP Security & Firewall, Wordfence Security).These plugins perform a complete 360-degree analysis of the security status of your site and then suggest the steps that you can take to protect your s ite from all common security threats.If there are some vulnerabilities that can be fixed easily, the plugins fix them on their own.
- Install a reliable firewall and antivirus: A reliable web application firewall and antivirus protects your site against a number of major security attacks, like Cross Site Scripting (XSS), Request Forgery, SQL Injection etc. Therefore, installing such a firewall and antivirus on your server should also be high in your priorities.
- Setup automated backup functionality: Finally, automating your backups is also essential for the security of your site, because they protect you in those circumstances when your site has been compromised. You’ll be able to easily migrate to another server in case you need to without losing any of your data if you’ve maintained your backups regularly.
Fortunately, there are many WordPress backup plugins available ithat can help you automate your backups (i.e. BackWPup, UpdraftPlus).
These steps can help you ensure the security of your LearnDash site to a large extent.
Step 9 – Add extensions for easy student management and enrollment
The final step is to add some extensions that allow easy management and enrollment of students. There are a number of popular LearnDash extensions that can help you do this and make life easier for you as an Administrator.
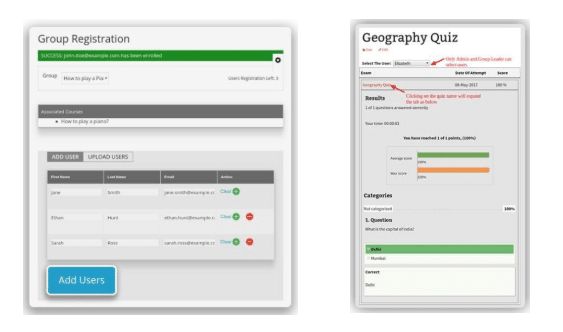
A few examples of popular LearnDash extensions include WISDM Group Registration, LearnDash Course Grid, the Uncanny Owl Toolkit for LearnDash, and the WISDM Quiz Reporting Extension.
WISDM Group Registration helps you enroll students in groups, LearnDash Course Grid adds a grid layout for displaying courses better, Uncanny Owl Toolkit helps with overall student and course management, and WISDM Quiz Reporting provides you with detailed and actionable reports on the progress of your students.
Phew! That covers our 9-step process of setting up a LearnDash website that can be developed into a course marketplace.
Towards the end,
Creating a LearnDash site that sells the courses created by others is a win-win situation for everyone.
The course creators get a platform to sell their courses, and you get to earn from their course content by managing the sales and marketing side of their educational content.
We hope this simple 9-step process to start such an e-Learning site has simplified everything for you, so you can get started in the right direction.
Drop a comment to ask us any questions you might have regarding the process, or share your feedback!
Here’s to creating a powerful course marketplace together!
Author: Sahana Karkal
Sahana is a WordPress enthusiast and Marketer for WisdmLabs. She loves discovering new ideas across the internet and sharing what she already knows.
Interesting read
Create Online Community Marketplace Like Facebook’s Local Market
How to use LearnDash Propanel